Patch Panels, Keystone Jacks and Wall Plates
A patch panel terminates permanent links in a rack; keystone jacks do the same at the wall. Learn 110 punch down, T568 wiring, labelling and what fails.
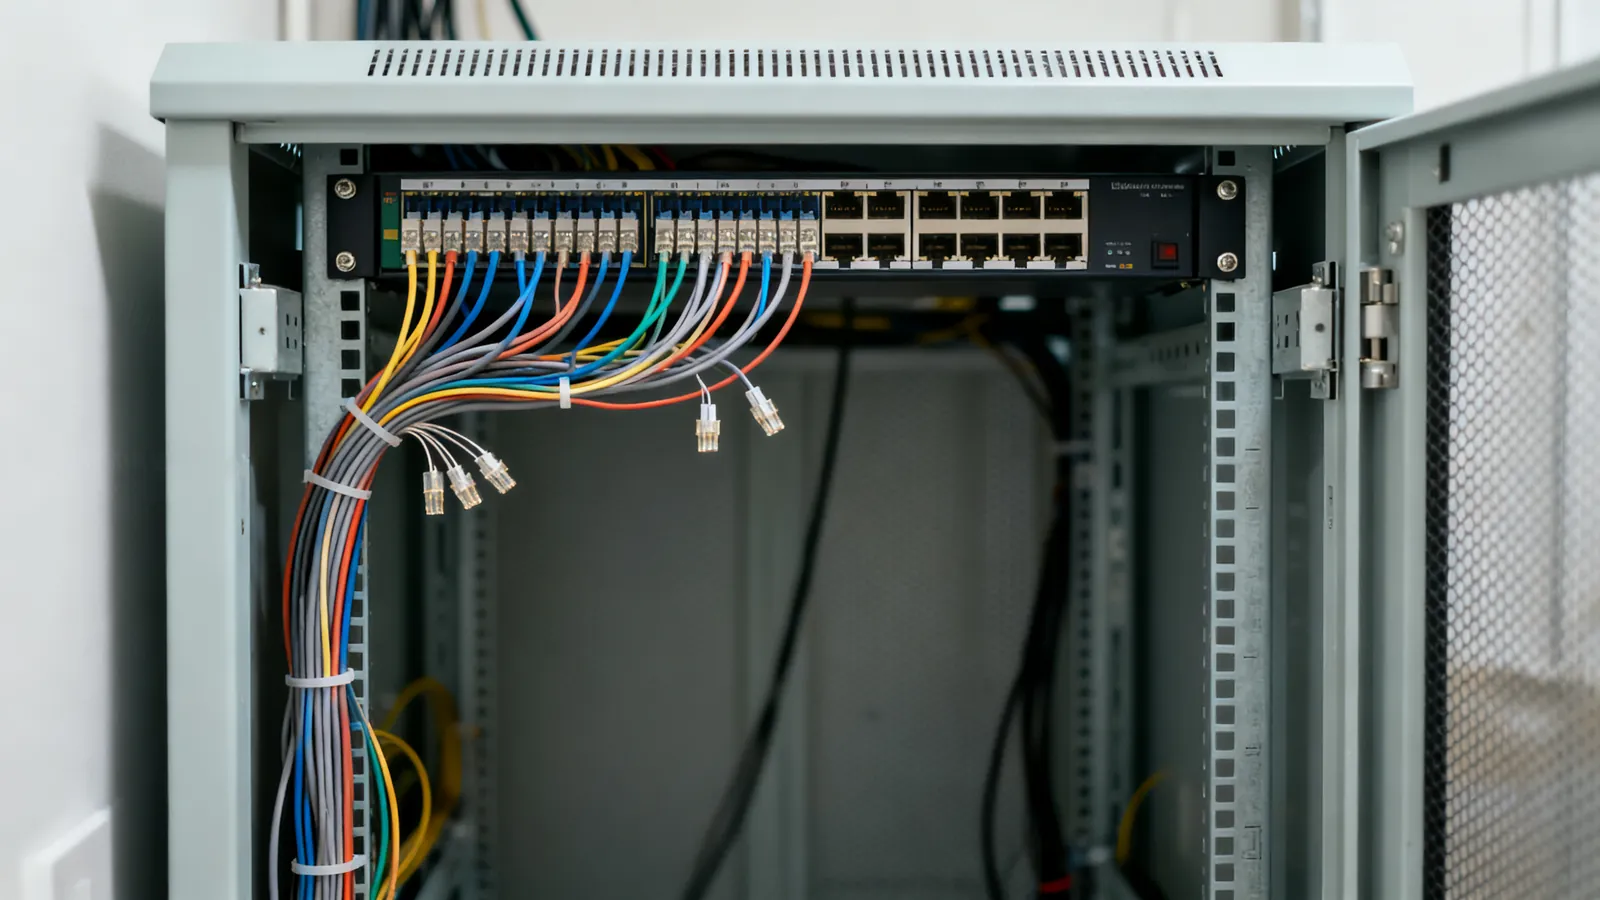
A patch panel and a keystone jack do the same electrical job in different places: each terminates a permanent link so it can be connected to equipment with a patch cord. The panel sits in the rack, where the horizontal cables from around the building arrive; the keystone jack sits in a wall plate or a surface box at the far end, where the run meets the room. Neither is a switch, a repeater or a speed upgrade. What they change is how the cable is terminated, how the link is labelled, and how easily a port can be moved, tested or replaced.
What each part does
A patch panel is a row of connectors mounted in a rack. Behind it, the permanent link cable is punched down on the rear; at the front, a patch cord joins the port to a switch. The permanent link is the cable in the wall, up to 90 m (295 ft) of the 100 m (328 ft) channel. The patch cords at each end make up the remaining 10 m (33 ft).
A keystone jack is a single connector that clips into a rectangular opening. The same jack fits a wall plate, a surface-mount box, a floor box, a desk grommet or a patch panel that takes keystone modules. That is the practical difference: a fixed patch panel has its connectors built in, while a keystone panel lets you choose the module and replace one port without discarding the panel.
Both are 8P8C connectors, the modular connector commonly called RJ45. Both are wired to the same pin order at both ends of a link. The choice between them is about where the termination lives, not about what the link can carry.
Patch panel vs keystone jack: the practical comparison
| Patch panel | Keystone jack | |
|---|---|---|
| Where it lives | Rack or cabinet | Wall plate, box, desk or keystone panel |
| Terminates | Many permanent links in one place | One permanent link at the room end |
| Rear connection | 110 punch down, or coupler | 110 punch down, or coupler |
| Front connection | Patch cord to switch | Patch cord to device |
| Labelling | Port numbers on the panel | Port number on the plate or jack |
| Moves and changes | Re-patch at the panel | Re-patch at the wall |
| Typical use | Structured cabling, comms room | Outlet in an office, home or studio |
A coupler-style panel or jack has a socket on both sides and no punch down: the permanent link is fitted with a plug and pushed in. That is faster and needs no punch tool, but it adds a mated connection in the channel and is not how a certified permanent link is usually built.
Punching down a keystone jack
The rear of a punch-down jack has slots for the eight conductors, marked with the colour code. The work is the same whether the jack is going into a wall plate or a panel.
- Strip the cable jacket back only as far as the jack needs. Leave the pair twists in place as long as possible.
- Set the conductors into the slots following one wiring scheme. T568A and T568B differ only in swapping the orange and green pairs; both work, but one scheme must be used at both ends of every cable in the building. The full colour order is set out in T568A vs T568B: Ethernet wiring colour order.
- Keep the untwisted length at the termination to no more than 13 mm (0.5 in). More than that degrades the link and can fail a certification test.
- Press each conductor into its slot with a 110 punch-down tool. The tool cuts the excess wire and seats the contact in one action. Work from the far side back towards the cable entry so the tool is not fighting the jacket.
- Check the wiremap before closing anything up. A split pair, where a conductor is seated in the wrong pair, passes a simple continuity test and only shows up on a tester that measures crosstalk.
- Fit the jack into the plate or panel, snap the cover on, and label both ends.
A punch-down jack needs a punch tool. A coupler jack needs a crimped plug on the cable instead, which is covered in how to crimp an RJ45 connector, step by step.
Wall plates and the room end
An Ethernet wall plate is a faceplate with one or more openings for keystone modules. A single-gang plate usually takes one to four modules; a double-gang plate takes more. The plate screws to a box in the wall, or to a surface box where cable is run on the surface.
At the room end, the jack is the permanent link’s endpoint. The device is connected to it with a patch cord, not with a plug crimped onto the permanent link. Factory-made patch cords are recommended by TIA, and they use stranded copper that tolerates repeated flexing. The cable in the wall is solid copper, which is what a punch-down contact is designed to grip.
Label both ends of every cable to ANSI/TIA-606. A port number at the panel that matches a port number at the wall turns a fault-finding job into a two-minute check.
Do I need a patch panel?
A patch panel earns its place when more than a few cables arrive in one spot. It terminates each permanent link on a fixed, labelled port, so a switch port can be moved by changing one patch cord at the front. Without a panel, the same job means reaching behind the switch and re-plugging a stiff horizontal cable, which stresses the plug and the switch port.
For a small installation, a keystone panel gives the same layout with modules you can replace individually. For a single run to one room, a wall plate at each end and a patch cord at each end is enough; a panel adds nothing.
A panel also makes testing practical. A certification tester needs access to both ends of the link, and a panel presents every permanent link in one row. A TDR shows the distance to a fault, which is far easier to act on when the port is labelled.
If the layout is still being planned, the room-by-room decisions are covered in planning a wired home network.
Cable, category and what the panel does not change
The panel and jack must match the cable category. Cat5e is rated to 100 MHz and carries 1000BASE-T to 100 m (328 ft); Cat6 is rated to 250 MHz and carries 10GBASE-T up to 55 m (180 ft), and as little as 37 m (121 ft) where many cables run bundled together. Cat6a is rated to 500 MHz and carries 10 Gbps over the full 100 m (328 ft). A Cat6a cable terminated on a Cat5e jack is a Cat5e link.
Conductors matter too. Solid copper is used for horizontal runs; stranded copper is used for patch cords. Copper-clad aluminium does not meet TIA category standards: it has higher resistance, is brittle when flexed, and runs hotter under PoE. A punch-down contact that will not grip properly, or a jack that accepts only a narrow range of conductor sizes, is a sign of a part that will not hold a certified link.
Shielded cable needs shielded jacks, shielded plugs and shielded patch panels, with the shield grounded through the equipment. A shield that is broken or not grounded gives no benefit and can pick up noise.
What goes wrong
- Too much untwisted wire at the jack. More than 13 mm (0.5 in) of untwisted conductor at a Cat5e or higher termination fails the standard and shows up as crosstalk.
- Split pairs. A conductor seated in the wrong pair passes a continuity test and fails on crosstalk. Only a tester that measures crosstalk finds it.
- Mixing T568A and T568B within a building. Both schemes work, but a link wired A at one end and B at the other is a crossover cable, not a straight-through link. Use one scheme everywhere.
- Crimping a plug onto solid horizontal cable for a permanent link. The plug is not the right termination for solid cable, and the link is no longer a proper permanent link.
- Bending or pulling too hard. The installed bend radius for 4-pair UTP is at least 4 times the cable’s outside diameter, and maximum pulling tension is 25 lbf (110 N).
- Running communications cable against mains power. The NEC asks for at least 50 mm (2 in) of separation unless a barrier separates them, and power cables should be crossed at a right angle. Mains work itself is a job for a licensed electrician.
- Unlabelled ports. A panel with no labelling is a row of identical sockets; every move and every fault costs time.
- Assuming a panel adds speed. The panel, jack and plate are passive connections. The category of the cable, the quality of the terminations and the length of the channel set what the link can carry.
Building a tidy panel-to-switch layout
Bring the horizontal cables into the rack from one side and dress them to the rear of the panel in order, so port 1 is the first cable in the bundle. Punch down from one end of the panel to the other. Leave a service loop at the rear so the panel can be moved without pulling on the terminations.
At the front, use patch cords of the right length. A cord that is too long becomes a tangle; one that is too short puts strain on the panel and the switch port. Keep power cords and patch cords separated, and cross them at a right angle where they must meet.
For PoE, remember that higher power heats bundled cable. Cat6 or Cat6a at 23 AWG runs cooler than thinner cable, and copper-clad aluminium should never carry PoE. The 100 m (328 ft) limit applies to every speed from 10 Mbps to 10 Gbps on the matching category, and it is set by signal loss and timing, not by the panel.
Finally, test before you close up. A wiremap tester finds opens, shorts, crossed wires and reversed pairs. A qualification tester checks whether a link carries a given speed. Only a certification tester proves a link meets the Cat6 or Cat6a limits, and it is the only way to sign off a permanent link.
Common questions
Do I need a patch panel at home?
If more than a few cables arrive in one place, yes. A panel gives each permanent link a fixed, labelled port, so moving a device to another switch port means changing one patch cord at the front. For a single run to one room, a wall plate at each end with a patch cord is enough.
What is the difference between a patch panel and a keystone jack?
They do the same electrical job in different places. A patch panel holds many terminations in a rack, where the horizontal cables arrive. A keystone jack is a single module that clips into a wall plate, box or keystone panel at the room end. A keystone panel combines the two: a rack panel that takes keystone modules.
How do I punch down a keystone jack?
Strip the jacket back only as far as the jack needs, keep the pair twists in place, and set the conductors into the marked slots using one wiring scheme. Press each conductor in with a 110 punch-down tool, which cuts the excess wire and seats the contact. Keep the untwisted length to 13 mm (0.5 in) or less, then check the wiremap before closing the plate.
Can I use a keystone jack instead of a patch panel?
Yes, if the panel is a keystone panel. A keystone panel takes the same modules as a wall plate, so one port can be replaced without discarding the panel. A fixed patch panel has its connectors built in and cannot take keystone modules.
Does a patch panel affect Ethernet speed?
No. A panel, jack and plate are passive connections. The category of the cable, the quality of the terminations and the length of the channel set what the link can carry. Cat6a is rated to 500 MHz and carries 10 Gbps over the full 100 m (328 ft); a Cat6a cable on a Cat5e jack is a Cat5e link.
Read next
Cat5e vs Cat6 vs Cat6a: Which Ethernet Cable to Buy
Cat5e, Cat6 and Cat6a compared: bandwidth, 10 Gbps reach, shielding and when each category is the right choice for home or office cabling.
Cat7 and Cat8 Cables: What They Are and Who Needs Them
Cat7 is ISO-only with GG45 or TERA connectors; Cat8 is a 30 m data-centre cable. Learn what each standard says and what to buy for home or office.
Ethernet Cable Categories: Cat5e to Cat8
Ethernet cable categories compared: Cat5e, Cat6, Cat6a, Cat7 and Cat8 rated frequency, speed and distance, plus which to buy for home, office and 10 Gbps.